
Tutorial Details
- Program: Adobe Illustrator CS
- Difficulty: Beginner
- Estimated Completion Time: 30 mins
Final Product What You'll Be Creating

The Argyle pattern dates back to 17th-century Scotland. Learn how to make a 21st-century digital version in 10 easy steps!
Step 1
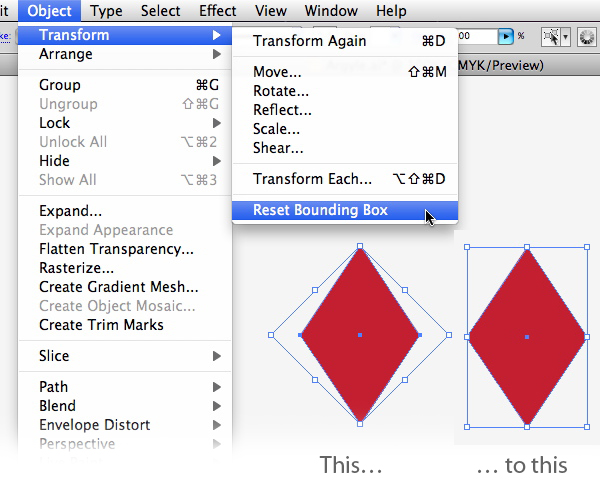
Use the Rectangle tool (M) and draw a square. Hold down the Shift key to constrain it to a perfect square. Rotate the square 45°. Hold the Shift key while turning the bounding box to constrain to 45° angles. Scale the rotated square by about 67% horizontally.
Go to Object> Transform > Reset Bounding Box. Now you have a basic diamond shape, which is the building block of the pattern.

Step 2
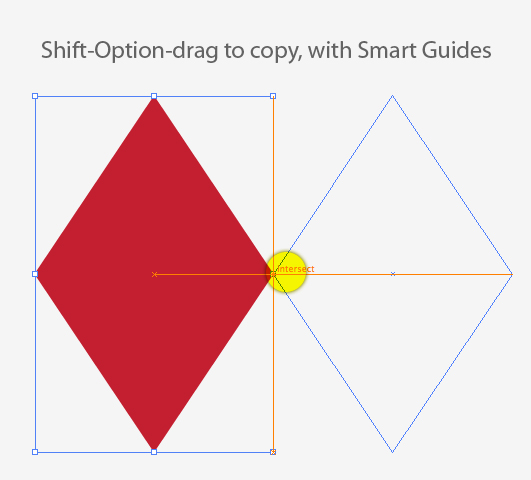
Turn on Smart Guides under the View menu. Hold down the Shift key and the Option (PC: Alt) key to drag a copy of the diamond. Make sure the left point of the copy aligns with the right point of the original. Press Command + D to make two more copies.
Step 3
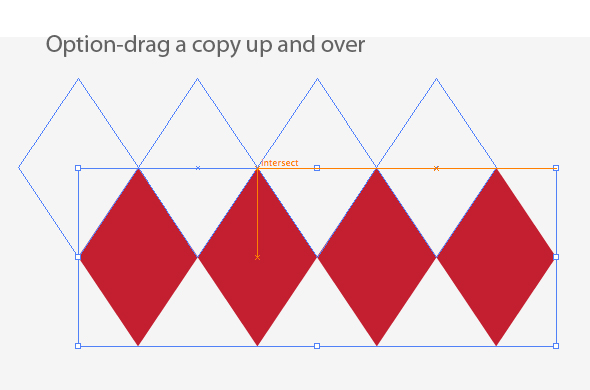
Select the four diamonds, and again using Smart Guides, Option-Drag a copy above and in-between the others.
Step 4
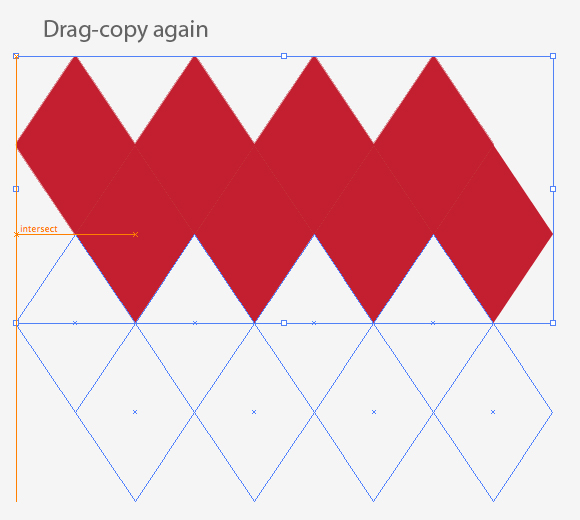
Now take the two groups and duplicate them as before, holding down the Shift key to align them to the original group. Keep an eye on the Smart Guides to make sure everything is aligned perfectly. When you’re done, you should have a set of diamonds that looks like the image below.
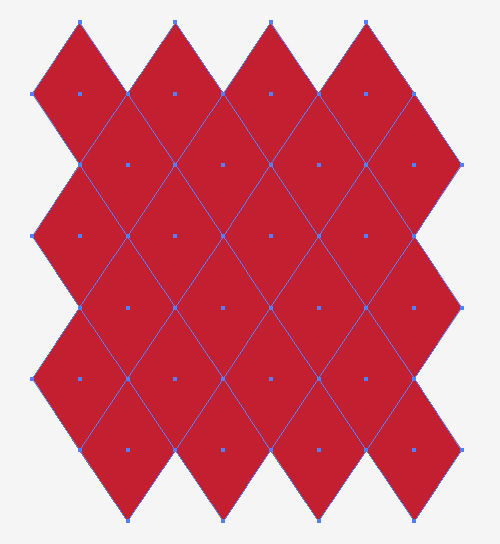
Step 5
Now recolor the diamonds in the Argyle color scheme, with alternating colors diagonally.
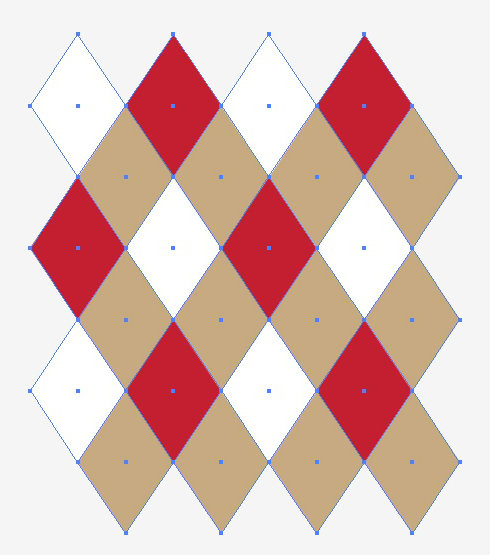
Step 6
Select everything and Shift + Option + Drag a copy off to the side. Give each diamond in this group a fill of none and a contrasting color for the stroke. Go to the Strokes panel and choose a dashed line with a round end cap. Usually a gap that is twice the value of the dash will look good. The stroke width will depend on the overall scale of your pattern.

Step 7
Drag the stroked diamonds back on top of the others, so that they bisect them. Again use the Smart Guides to make sure everything is aligned.

Step 8
Expand the dashed lines by going to Object > Path > Outline stroke. Note: Depending on your version of Illustrator, it may be necessary to use the Expand command, or Flatten Transparency, which are both under the Object menu. The goal here is to create individual objects from the dashed lines.
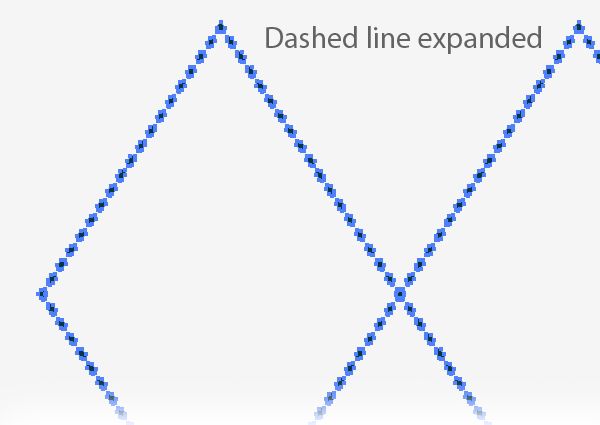
Step 9
Using the Rectangle tool (M), draw out a rectangle over the pattern. The rectangle should precisely bisect the left and right diamonds vertically, and the top and bottom diamonds horizontally. Again, use Smart Guides to hit the mark. Zoom in on the pattern and inspect it in outline mode (Command + Y) to be sure that everything lines up. You may wish to delete the diamonds that fall entirely outside the rectangle. They are superfluous, but were useful in first visualizing the pattern.
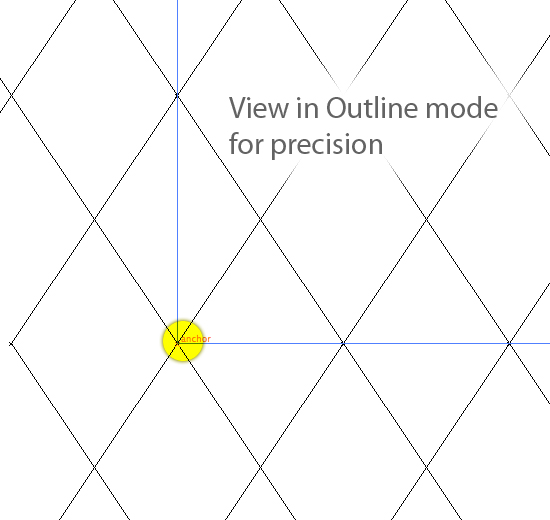

Step 10
Select everything, and crop using the Pathfinder panel. Now drag the cropped object into the Swatches panel to create the seamless pattern fill. Change the colors of the original objects and create more pattern swatches.


Conclusion
Now you have a library of Argyle swatches, suitable for any occasion!
This Quick Tip is available as a Free Download to all Vectortuts+ visitors, and is just a fraction of the content you can access via our Premium Membership System.
Tuts+ run a Premium membership system that costs $9 a month (or $22 for 3 months!). Members have full access to the hundreds of full length tutorials, professional source files and periodic extra tutorials available from all our Premium Program sites!
To join today and begin downloading High Quality Vector Resources and Tutorials visit Vector Premium.
댓글 없음:
댓글 쓰기